Plugins: Difference between revisions
Tag: Undo |
No edit summary |
||
| (2 intermediate revisions by the same user not shown) | |||
| Line 1: | Line 1: | ||
'''Plugins''' for Plover extend its functionality in various ways, from the tools available in the GUI to the types of dictionaries supported. They are available starting from Plover version 4.0. | '''Plugins''' for [[Plover software|Plover]] extend its functionality in various ways, from the tools available in the GUI to the types of dictionaries supported. They are available starting from Plover version 4.0. | ||
For Plover users, information on existing plugins and installation follows. For those interested in Plover [[plugin development]], information on writing them is also available. | For Plover users, information on existing plugins and installation follows. For those interested in Plover [[plugin development]], information on writing them is also available. | ||
Many Plover plugins are available for installation through Plover's plugin manager, the complete list of which is located at the [[Plugin Registry]]. | |||
== Types of Plugins== | == Types of Plugins== | ||
| Line 56: | Line 58: | ||
# Once the plugin has finished installing, close the progress window. | # Once the plugin has finished installing, close the progress window. | ||
# Press the restart button. | # Press the restart button. | ||
# Some plugins require extra setup. See [[Plugins#Types of Plugins | # Some plugins require extra setup. See [[Plugins#Types of Plugins|types of plugins for more detail.]] | ||
<youtube>mQHPlGcMHEw</youtube> | <youtube>mQHPlGcMHEw</youtube> | ||
| Line 123: | Line 125: | ||
== Plugin Development == | == Plugin Development == | ||
{{Main article|Plugin Development}} | |||
[[Category:Plover]] | [[Category:Plover]] | ||
Latest revision as of 16:42, 23 May 2025
Plugins for Plover extend its functionality in various ways, from the tools available in the GUI to the types of dictionaries supported. They are available starting from Plover version 4.0.
For Plover users, information on existing plugins and installation follows. For those interested in Plover plugin development, information on writing them is also available.
Many Plover plugins are available for installation through Plover's plugin manager, the complete list of which is located at the Plugin Registry.
Types of Plugins
Dictionary Plugins
Dictionary plugins add support for other dictionary formats besides Plover’s native JSON format. Examples include plover-python-dictionary, plover-yaml-dictionary, and plover-excel-dictionary.
There is no setup required for these plugins beyond installation and restarting Plover.
Machine Plugins
Machine plugins add support for new input protocols, such as the serial input from various professional stenography machines or even MIDI keyboards. Examples include plover-stenograph, plover-controller, and plover-midi.
These plugins add new entries in the Machine dropdown menu in Plover's configuration.
System Plugins
System plugins defines new key layouts and theories. This lets Plover support stenographic layouts other than the standard Ward Stone Ireland layout. Examples include plover-michela, supporting the Italian Michela layout, or plover-korean, supporting the Korean CAS layout.
To use a system plugin, it must be configured under the System tab of Plover's configuration.
Command Plugins
Commands plugins allow Plover to run arbitrary commands in response to a stroke. The logic can interact with the stenography engine itself but can also do completely separate tasks. Examples include plover-system-switcher and plover-vlc-commands.
Setup details vary per plugin. Check the documentation for each plugin for setup details.
Macro and Meta Plugins
Macro and meta plugins add or modify translations in the translator, typically for transforming previously entered text. Macros have access to the entire translation and can perform transformations on the raw stroke input, whereas metas only have access to the translated output. Examples include plover-last-translation and plover-retro-quotes.
To use macro and meta plugins, see the documentation per plugin for setting up entries.
GUI Plugins
GUI plugins add user-facing tools, like the built-in Suggestions and Lookup tools. GUI plugins are automatically loaded at startup, and can be accessed by clicking on its icon on the toolbar or in the Tools dropdown menu. Examples include Spectra Lexer, plover-layout-display, and plover-wpm-meter.
There is no setup required for these plugins beyond installation and restarting Plover.
Extension Plugins
Extension plugins can be used to execute arbitrary code. Examples include plover-auto-reconnect-machine and plover-focus-track.
To use an extension plugin, it must be enabled in the Plugins tab of Plover's configuration.
Community Recommendations
Community member panathea and others compiled a list of dictionaries and plugins here. It was last updated in 2021.
- Spectra Lexer This is like the lookup or suggestions window, but with a lot of extra features such as explanations for why a word is briefed that way and diagrams. There is also a web version and a bot in the discord server, though these only use the default Plover dictionaries and not any additional user dictionaries you may have.
- Plover-clippy or Plover-clippy-2 Logs suggestions that are more efficient than what you used to type to a file in your plover configuration directory. Useful for finding new briefs, especially for phrases. By default the output of Plover-clippy-2 is written into
clippy_2.orgin your config folder, which you can open from Plover's menu item "Open config folder". Open the clippy file in a text editor and review it from time to time to see what you could type more efficiently. - Plover Word Tray Automatically looks up efficient outlines for words that start with the current input, much like autocomplete suggestions. It's similar to the lookup window and suggestions window in one. In addition, if you are stuck on a word, you can start fingerspelling it or sound out the first syllable and it'll try to guess what you're trying to spell.
How to Install Plugins
Via the Plugins Manager (recommended)
- Open the main window of Plover.
- You can also right click on the Plover icon.
- Go to
Tools → Plugins Manager. - Browse the available plugins and select the one you want to install.
- Select
Install/Updateto install the plugin. - Press
Yesto the security warning. - Once the plugin has finished installing, close the progress window.
- Press the restart button.
- Some plugins require extra setup. See types of plugins for more detail.
If you do not see the plugins manager, follow the instructions here to bring it back.
Manually Installing Plugins
Some plugins are not yet in the registry and do in the show up in the plugins manager list. It is still possible to manually install plugins. Ensure you are running Plover 4.x – version 3 and below do not include plugin support.
Find the plugin on PyPI or as a git repo
Plugins on PyPI

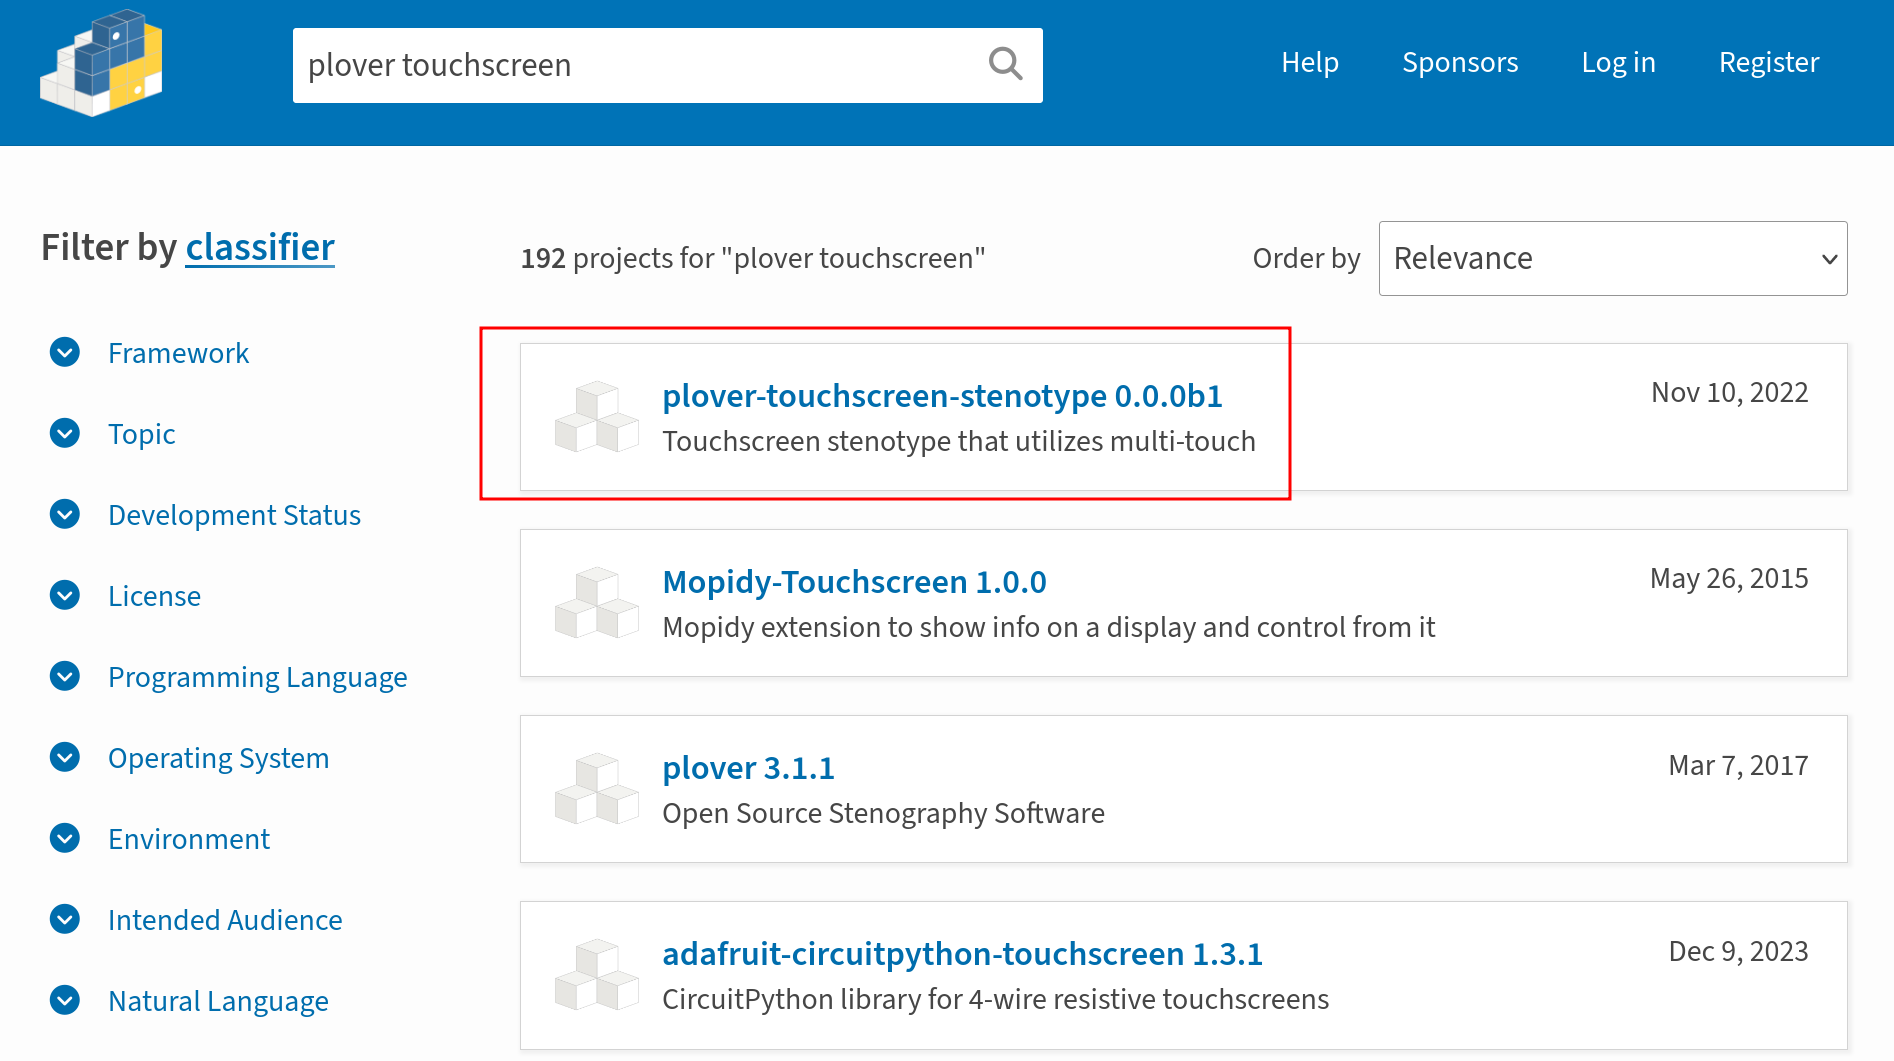
plover-touchscreen-stenotype on PyPISearch for your plugin on PyPI. If you found the plugin, take note of the name (e.g., plover-touchscreen-stenotype).
Plugins not on PyPI
If the plugin is not listed on PyPI follow these steps:
- Take note of the URL of the git repository.
- It will look something like this: https://github.com/greenwyrt/plover2CAT.
- Copy this to your clipboard.
- Install git.
- You may need to restart after installing git.
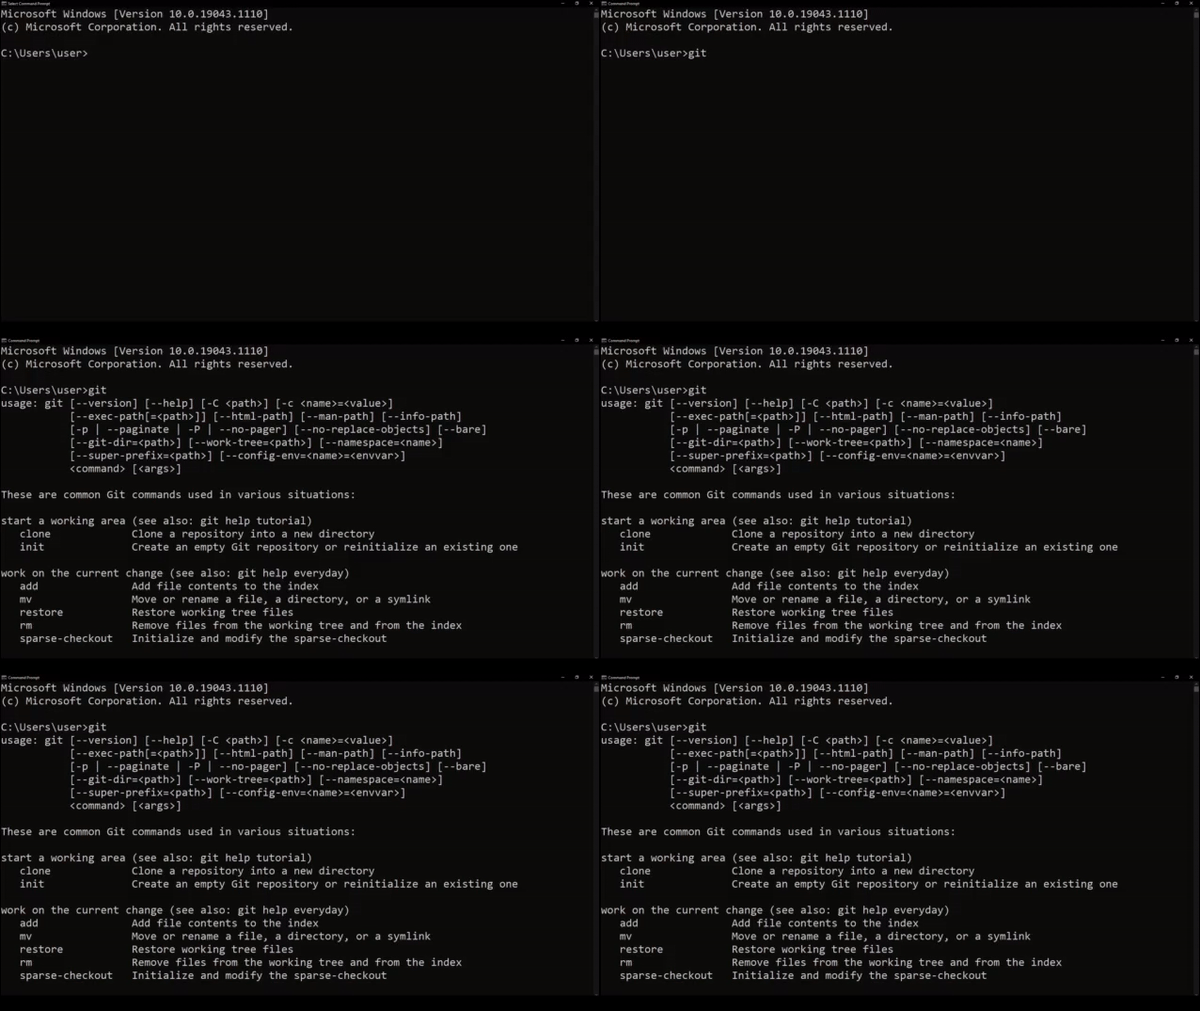
- Verify git is working.
- Open a command line (
Command Promptapp on Windows,Terminalon Linux and macOS). - Type
gitand press enter.
- Open a command line (
You should see something the following output:
If the above command does not work, first verify you've installed git. If you are still running into an error when trying to run git, you may have to restart or manually add git to your path (particularly if you are on Windows).
Install the plugin
Installing the plugin requires accessing the Plover executable as outlined in the invoke Plover from the Command Line page. For each command listed below, replace plugin-name with an applicable string:
- For plugins on PyPI, this is the name of the package (e.g.,
plover-touchscreen-stenotype). - For other plugins, this is the URL from the previous step, prefixed with
git+(e.g.,git+https://github.com/greenwyrt/plover2CAT).
Linux
Open a terminal in the same folder as the Plover AppImage and run the following command:
./plover-4.0.0rc2-x86_64.AppImage -s plover_plugins install plugin-name
Note that depending on the version of Plover you are using, the first part of the command may be different. Instead of typing the whole filename out, you can type ./plover and then press Tab to autocomplete the rest.
Mac
Open a terminal and run:
/Applications/Plover.app/Contents/MacOS/Plover -s plover_plugins install plugin-name
Windows
First open a PowerShell window by following these steps:
- Right click the Plover app.
- Select
Open file location. - In the folder, hold down the Shift key and right click.
- Select
Open PowerShell window here.
Run the following command:
.\plover_console.exe -s plover_plugins install plugin-name
See the following video for the whole process:
TODO: Information on how to install the plugins manager for non-developers, screenshots, point developers towards the development workflow section which has other options.
Plugin Development
- Main article: Plugin Development

